Refreshed suspension on a 2001 2wd Toyota Tacoma 2RZ 2.4L 4cyl. Parts list and torque specifications listed below.
Replaced:
- Upper & Lower Control Arms
- Ball Joints
- Tie Rod Ends
- Coil Springs
- Sway Bar Links
- Strut Rods
- Brake Lines
Truck has about ~113k miles and is located in New England so it has taken a beating with winter and road salt.
Problematic parts of the frame were repaired prior to this job using Safe T Cap parts.
General notes
- The $200 investment in the Magnetic Induction Heater to work on a rusty vehicle is 100% worth the investment.
- Cheap reciprocating saw blades barely made a dent in cutting through the seized bushing sleeves. Freud Diablo Carbide Reciprocating Saw Blades took time, but got the job done.
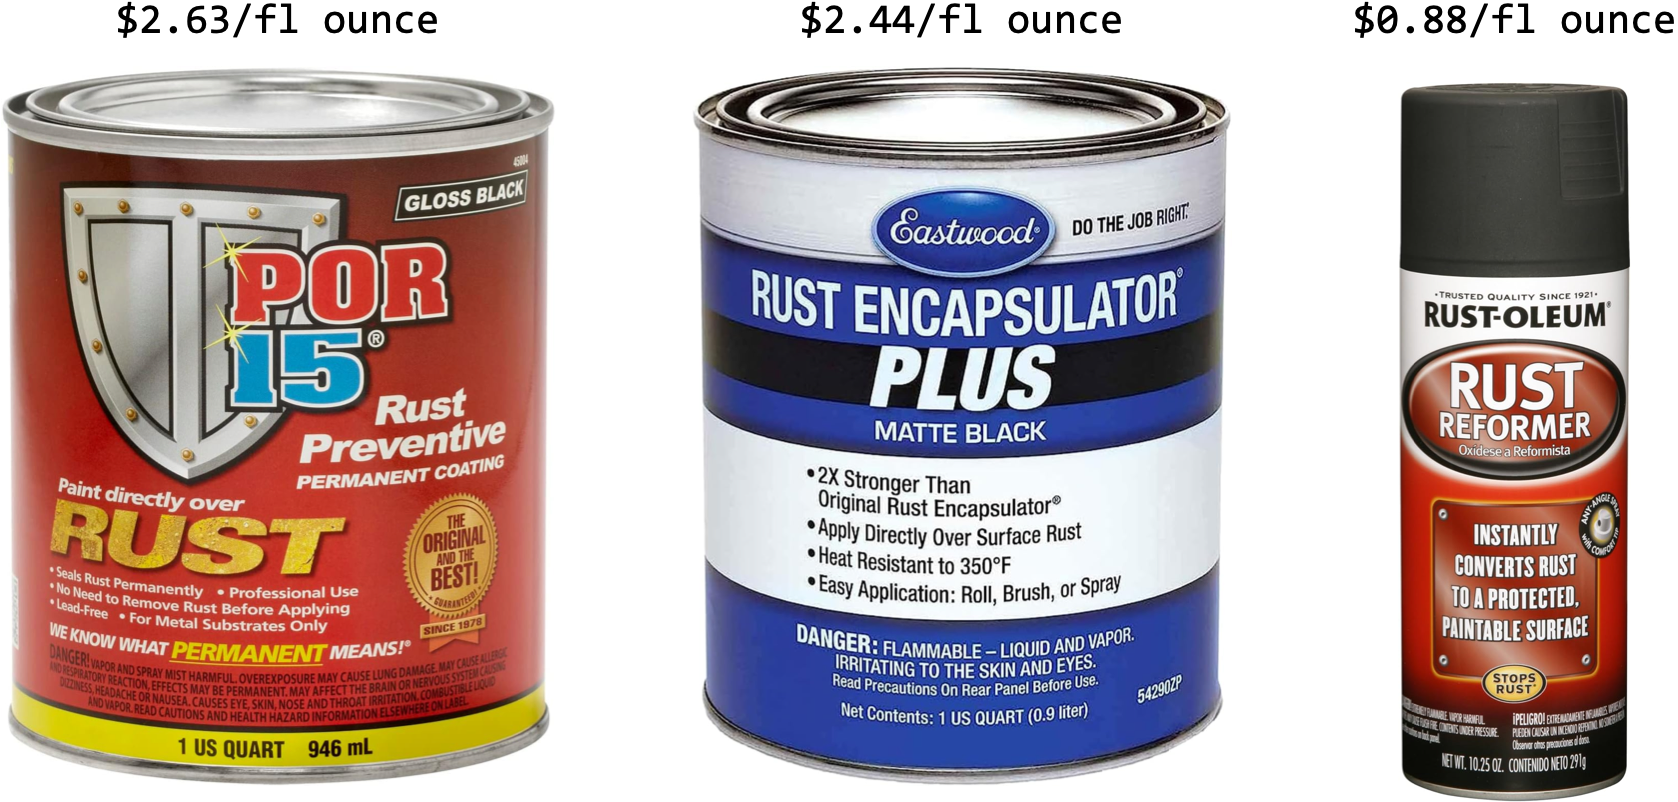
Notes on rust encapsulating/reforming paints

In the video you can see I used Eastwood Rust Encapsulator Plus paint. This paint was on for a couple months before I got to Fluid Film everything, and upon re-inspection I noted the paint held up well on certain parts (under fender) but was already chipping off on parts that had the most rust (steering knuckle, upper shock mount). Could have been application error, but I would not use again.
POR-15 was used on the frame by the installer who did the Safe T Cap repairs. It looks great until it chips, then it peels off in sheets and is really hard to sand/feather out the edges to do spot repairs. I would not suggest using POR-15 on clean/unrusted metal.
I’ve used POR-15 in the past on rusted parts on the underside of the truck. It appears rock solid first few years, but about 7 years out it was all a bubbly mess that needed to be redone. This was despite using the specific POR-15 cleaner and etching spray prior to painting.
Moving forward, my rust strategy is Rust-Oleum Rust Reformer spray (cheap and easy) followed by oil undercoatings.
For oil undercoatings, I’m using Fluid Film for the badly rusted stuff where penetration is needed and stickier Wool Wax on smooth/un-rusted areas.
Will reassess in a few years to see how this strategy is holding up.
Parts
- Daystar 1.5" Leveling Kit
- Coil Springs: Lesjöfors 4192515
- Upper control arms with ball joints:
- Lower control arms
- Lower ball joints
- Strut rods
- Sway bar links: MOOG K80596
- Tie rod ends: DORMAN TO74245X
- Wheel bearings:
- Inner TIMKEN SET5
- Outer TIMKEN SET3
- Seal SKF 19608
- Brake lines:
Tools
- Magnetic Induction Heater
- Eastwood Rust Encapsulator Plus
- Coil Spring Compressor
- 1/2" Nano Flex-Head Angle Impact Wrench
- Fluid Film
- Silicone plugs (for plugging disconnected brake hoses)
- Undercoating spray gun kit
- Freud Diablo Carbide Reciprocating Saw Blades
- Syringe (for neatly transferring paint from can without getting paint on the rim)
- Flare nut / crowfoot wrench set
- Hand held pump sprayer
- Brake line flaring tool kit
Torque Specifications
* Indicates torque should be done with suspension under load
- Upper control arm
- Pivot shaft/adjusting shim bolts 94 ft-lb*
- Arm-to-frame pivot bolts 148 ft-lb*
- Lower control arm-to-frame pivot bolts/nuts 148ft-lb
- Upper balljoints:
- Mounting nuts/bolts 23 ft-lb
- Stud nuts 80 ft-lb
- Lower balljoints:
- Mounting nuts/bolts 55 ft-lb
- Stud nuts 105 ft-lb
- Stabilizer bar:
- Bushing bracket bolts 22 ft-lb
- Link nuts 29 ft-lb
- Strut bar:
- Bar-to-frame nut/bolt 221 ft-lb
- Bar-to-lower control arm nuts 111 ft-lb
- Shock absorber:
- Lower fasteners 29 ft-lb
- Upper nut 18 ft-lb
- Wheel hub
- Mounting bolts 84 in-lb (7 ft-lb)
- To seat the hub, torque axle nut to 26 ft-lbs while spinning to seat bearings. Then loosen and hand tighten while spinning, ensuring hub can spin freely.
- Brakes:
- Brake line-to-caliper banjo bolt 22 ft-lb
- Caliper pins/bolts 65 ft-lb
- Caliper torque plate bolts 80 ft-lb
- Disc-to-hub bolts 47 ft-lb
